In the small town I live in, we have a handful of wonderful women. It's our stamp club and our Stampin' Up! lady has some things to make. The last meeting we made a calendar. When my uncle came to visit, I sent his wife and daughter one. It's a simple and easy thing to make and a nice little gift. The came from
Nancy Morgan's blog and
Michelle Tech's blog. The calendar strips can be found here:
http://www.2stampis2b.com/2009/01/four-seasons-calendar.html. You will have to reduce the size. I have a Mac so I found the instructions for shrinking didn't work for me. The base is 5.5 x 8.5, scored at 4.25. I used basic brown CS and DP from
Memory Box for the first quarter. I put my elements on one half of the CS. I used Nature's Silhouettes, a
Hero Arts stamp set I've had forever. I'm not sure if they even have this stamp set anymore, but it worked perfectly for this project.
Then the other side of the paper is decorated. I used "Laundry Line" DP by My Mind's Eye (I just love these papers). I found it at Hobby Lobby.
On the inside, one side is decorated for July, Aug, Sept. This DP is from Basic Grey. I was using up some scraps so I don't know what group of papers this one is from.
And this is the last side. The DP here is from
Club Scrap (I'm not sure if they still have this paper.) The ribbon is inserted into two holes at the bottom. This ties it together (wraps it up...haha). The top photo shows the ribbon tied to make a pretty package. When June is finished, you turn the calendar around and your ready for the rest of the year. I used Distress inks: Victorian Velvet, Stormy Sky, Bundled Sage, and Wild Honey. Fun! Fun! Fun! The circles are my family's birthdays. I'm ready for 2011.


 I promised I'd share a project and here it is. My granddaughter loves Wrigley's 5 Zing gum so I thought I'd wrap it up in a Halloween costume. I used Basic Grey eerie collection. The wrapper is 3 x 6", scored at 3/4, 1-1/4, 3-3/4, 4-1/4. Adhere on the back. The pull-out is 2-1/2 x 5-1/2, scored at 3-3/4 and 4-1/4. The inside edges (second picture) are tapered so it slides in and out easier. The belly band is 1 x 6, adhered in the back. I used a 1-3/8 circle punch with the designer paper, 1-7/16-green; and the scallop circle punch (black) from Stampin' Up! The boo stamp I found at Michael's once upon a time. I sponged Ranger distress ink (crushed olive) for color. I thought the wiggly eyes was a nice touch (a little texture humor). Hope you enjoy this as much as I know my granddaughter will.
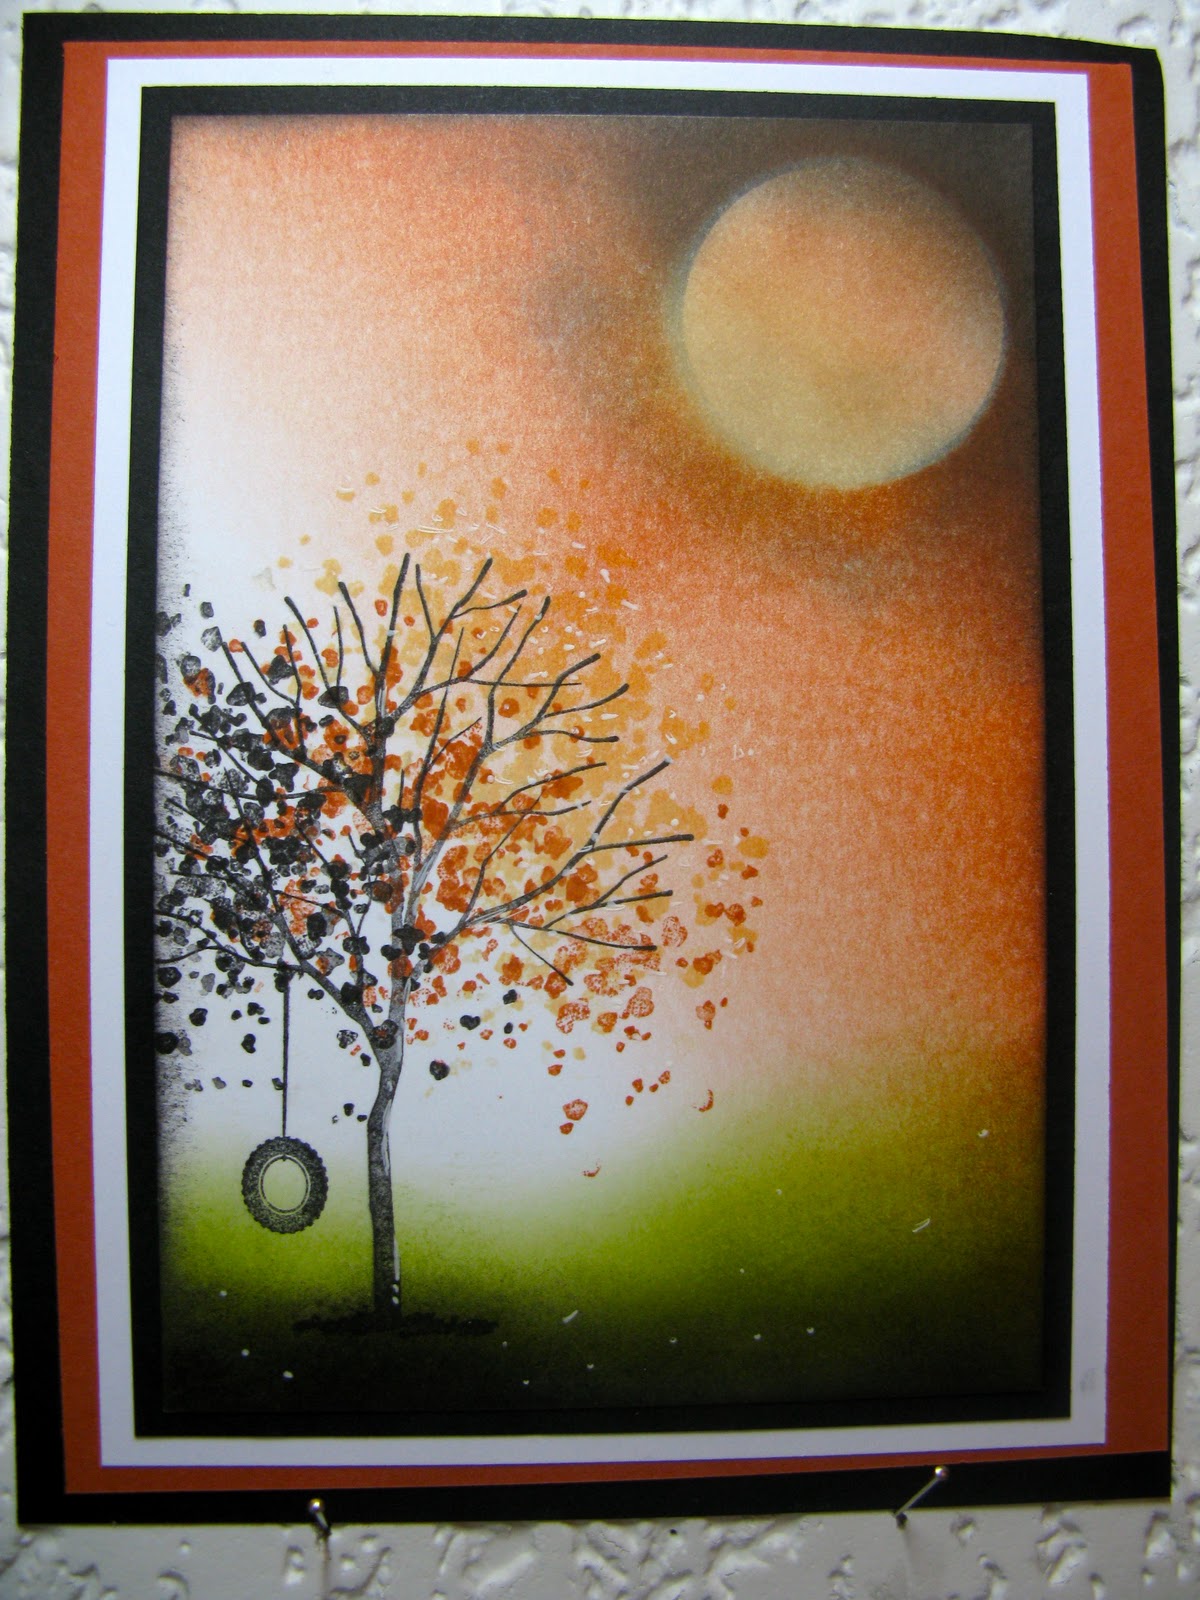
 Happy Halloween....It's a witchy time of the year. I saw this Shadow Box Card on Dawn's Stamping Thoughts. She featured a Christmas theme and I decided to change it up and make it spooky. I got the witch stamp set a long time ago, Best Witches, from Eat Cake Graphics (the other stamp is a witch flying into a tree; sentiment "Don't drink and fly"...just love it!). The papers are Basic Grey's eerie collection. The spider web and spider are from Memory Box, "Web Crawler." I embossed this image in white on velum and stamped the spider with Memento ink. I used brads to hold the velum in place. I used copic markers to color and just cut around the image with scissors. The Boo stamp was one I got at Michael's for $1.00...thought the google eyes would be cute. I have another Halloween project to share later.